You are using an out of date browser. It may not display this or other websites correctly.
You should upgrade or use an alternative browser.
You should upgrade or use an alternative browser.
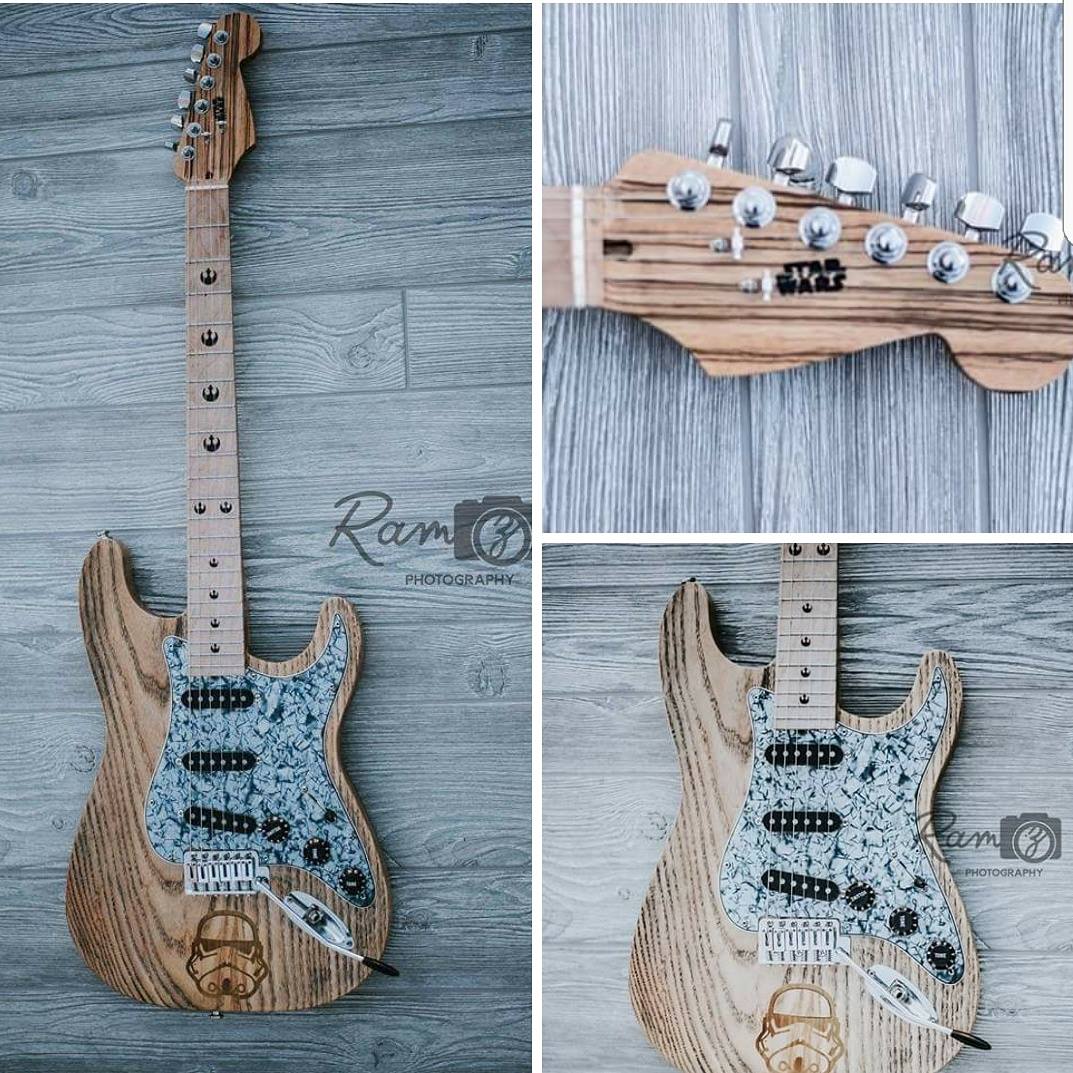
[Zen] 1 Piece Stratocaster build
- Thread starter SuperTrap
- Start date
More options
Who Replied?do you not have friends irl
LOL it's good to see another luthier who uses sanding disks to sand out of convenience than being fiscally responsible and just getting sandpaper sheets hehe. Although normally on the neck I use a belt from the belt sander separated so I can seesaw it back and forth to get an even curve
But why?
I was thinking it was just a one piece body.
Strats need bolt on necks for that POP/SNAP.
The pop snap has more to do with the straightness of the headstock with minimal break angle. Strats were created by an engineer who didn't even play guitar who wanted easily manufactured and replaceable parts. (leo fender)
This is no different than a neck thru guitar except there is no gluing of the flanking wings. The same pitfalls exist with both. If everything isn't perfectly measured and setup u have to unglue everything and fix it.
My latest build is wearing on me because all of the micro sanding of the carve... Sanding is the bane of my existence lol
Yes. Yes I would like to know more
Yes. Yes I would like to know more
I learned a new trick I am gonna try. Take a spinbrush toothbrush and cut all the bristles off and mount a tiny cut out sandpaper disk and I can lightly sand a lot of the nooks and crannys on it without having to do it all by hand. This will save me a bunch of time.
I learned a new trick I am gonna try. Take a spinbrush toothbrush and cut all the bristles off and mount a tiny cut out sandpaper disk and I can lightly sand a lot of the nooks and crannys on it without having to do it all by hand. This will save me a bunch of time.
Don't take me poking you the wrong way.. I get the detailed sanding challenges.
")
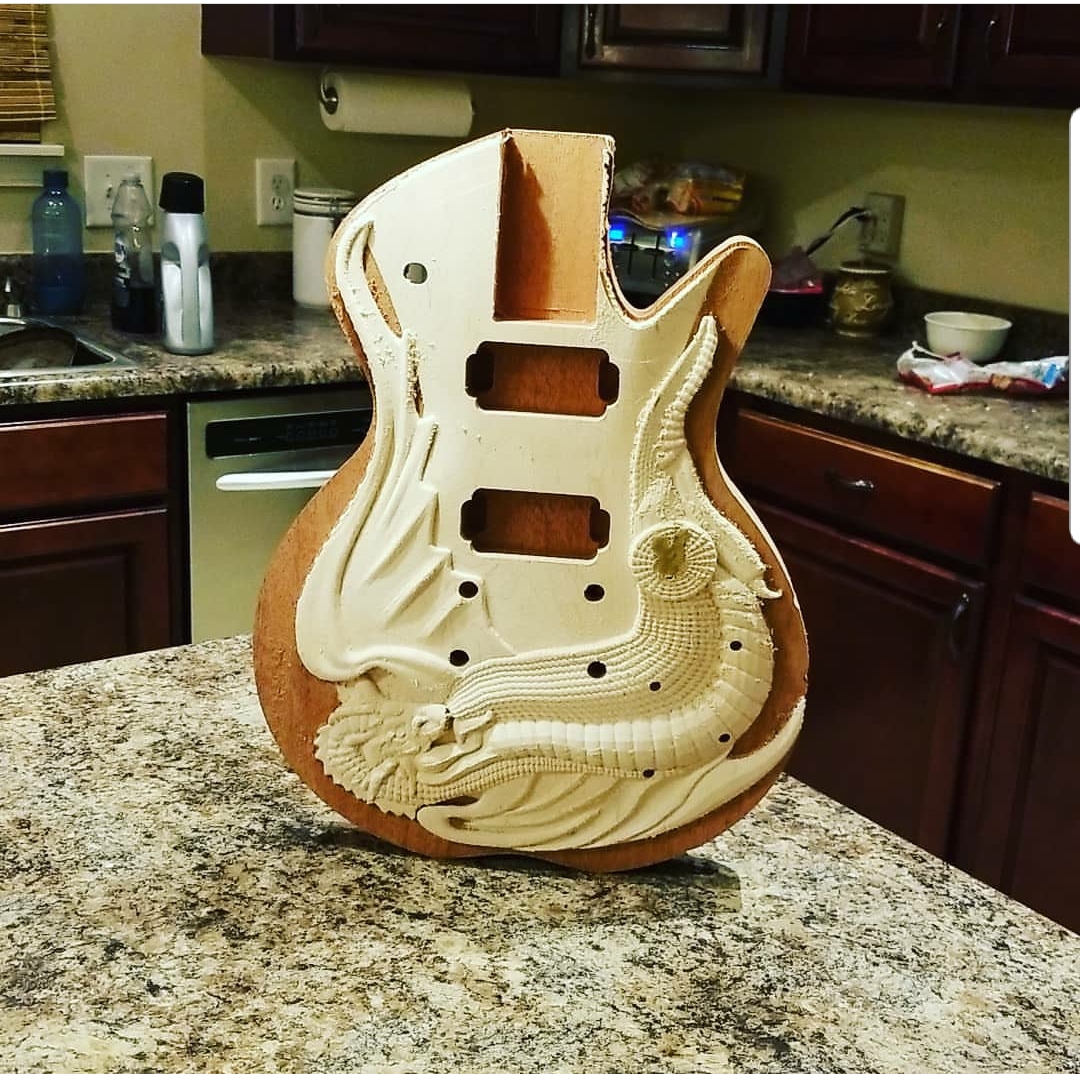
I am fascinated by that project itself. How did you do that? Your creation or were you able to find something that already existed and you have modified?
How do you plan to finish it? Are any of the features in the way of your right hand? How are planning on mounting the bridge as it appears to not be level at the moment?
I am not trolling you..I think it looks cool as fuck
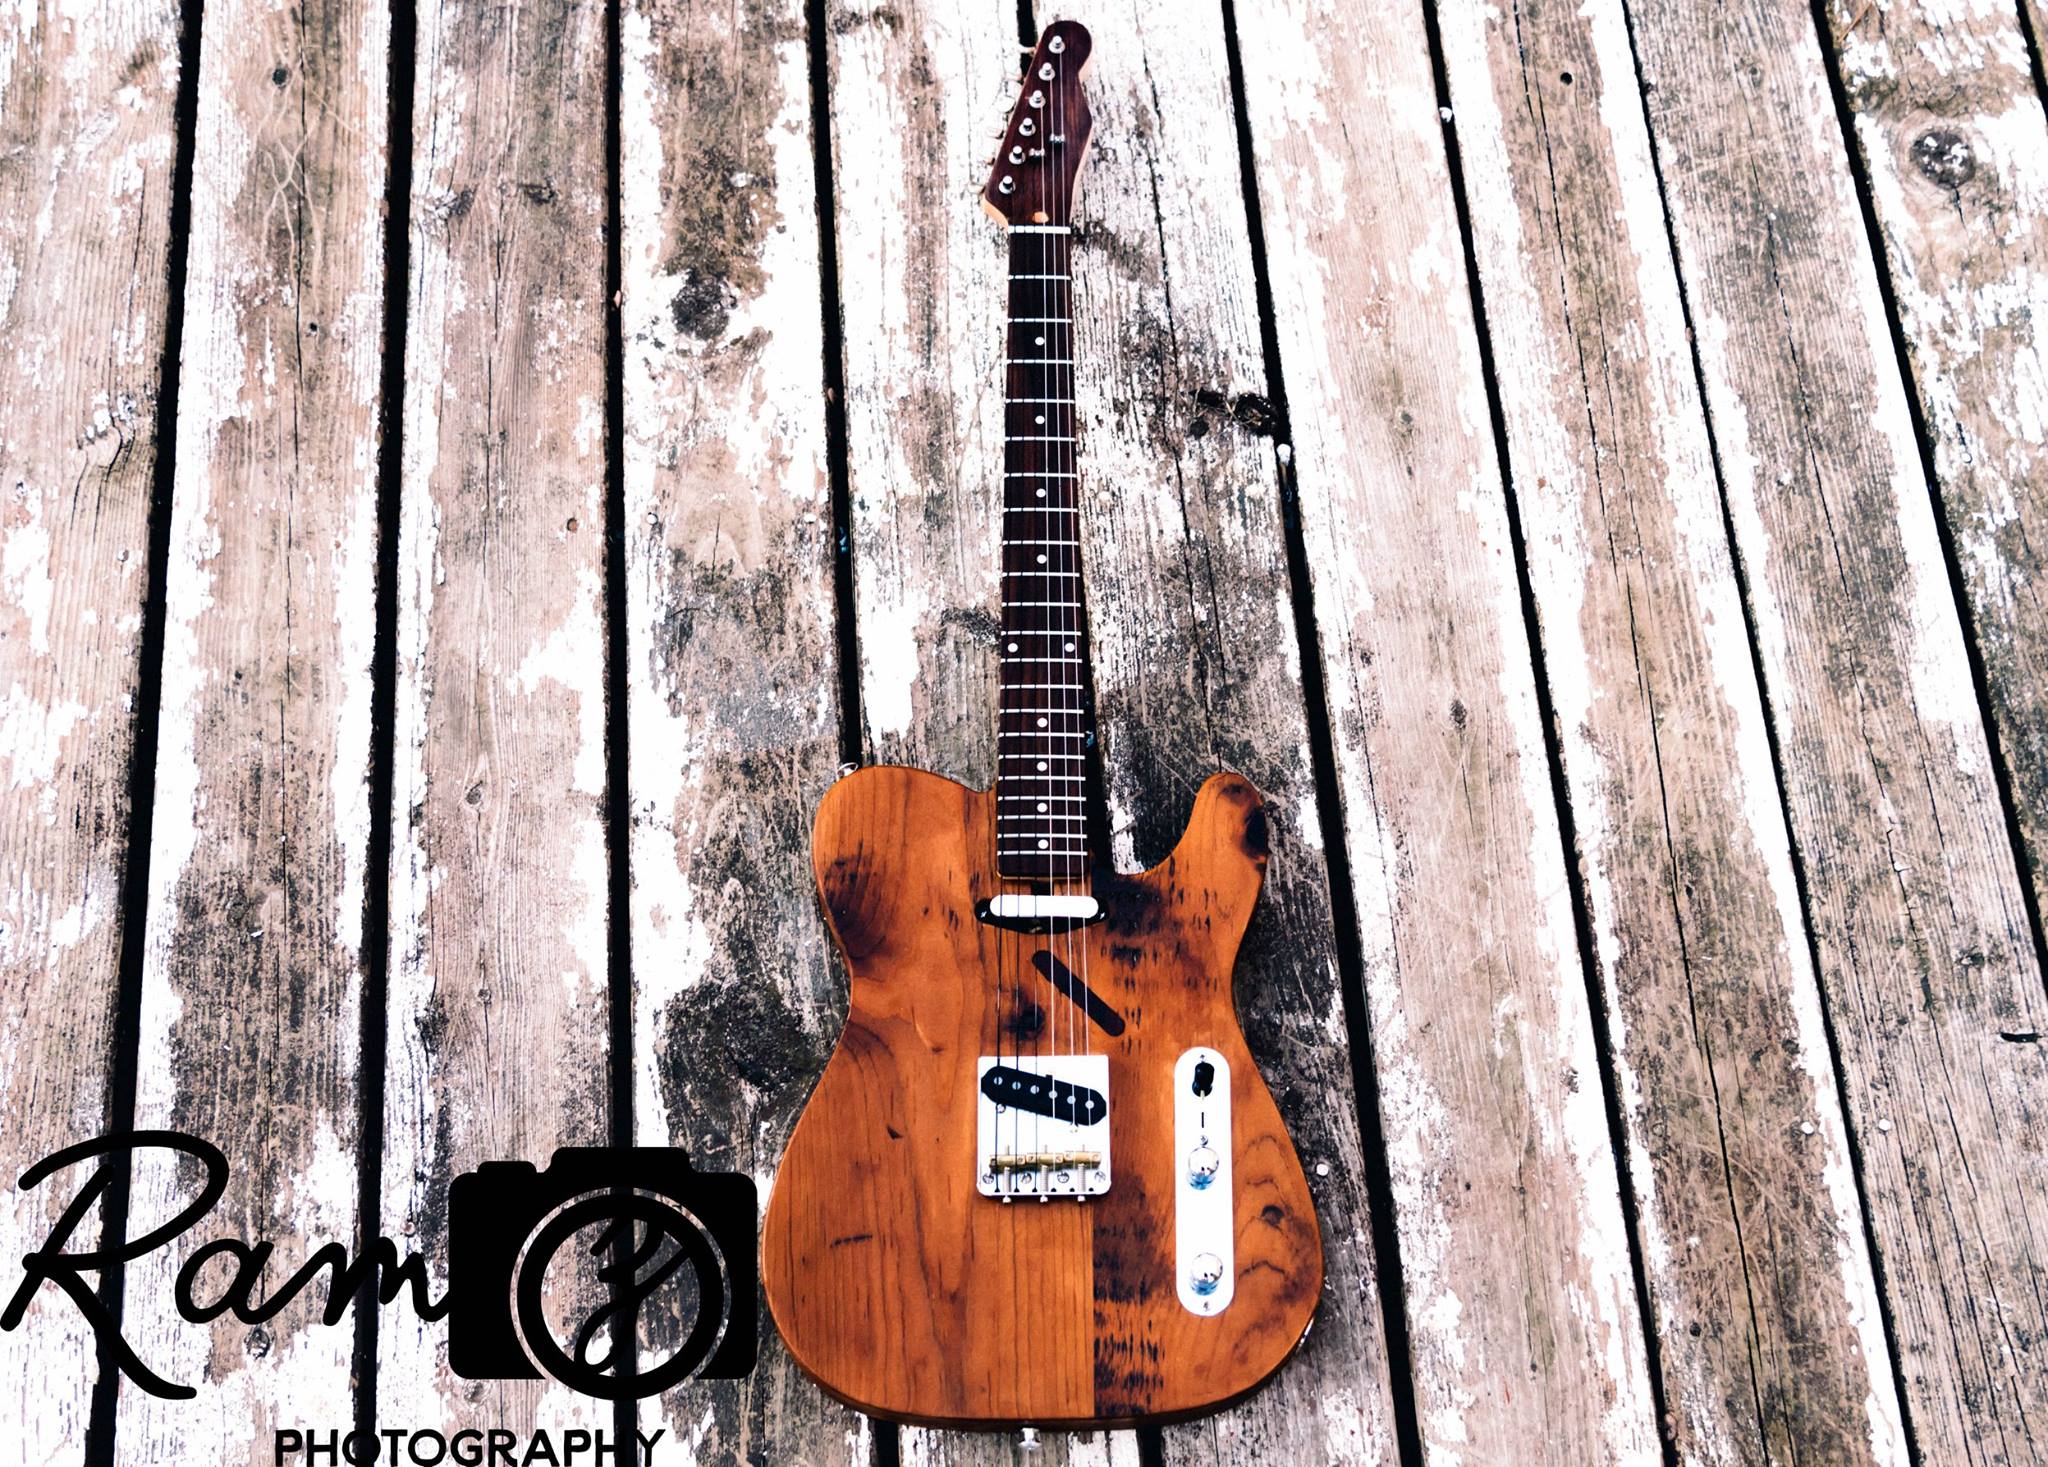
I don't remember if it was a telecaster or a Stratocaster....
also - that is pretty awesome
Also - get a small sandblaster, we use them all the time to clean up shit like that on large castings, a low power home job would probably do a decent job. One place I worked had a small benchtop one about a foot square that they never used, looking back I wish I had stolen it now, would have been really handy for things like this. You can make a simple one with an air gun and a soda bottle filled with whatever medium you want to spray. Just drill a cross hole in the nozzle, bang the nozzle through the cap and invert it, venturi does the rest. Or you can probably buy a cheap portable one from the hardware for $50
Last edited:
45 people? you going to burning man?
yah cuz burnin man fest b next weekend ya dumfuk WYTE TRASH fukn pussycuck disgr8c 2 ya own race frenz n famly smdh lol

Don't take me poking you the wrong way.. I get the detailed sanding challenges.
I am fascinated by that project itself. How did you do that? Your creation or were you able to find something that already existed and you have modified?
How do you plan to finish it? Are any of the features in the way of your right hand? How are planning on mounting the bridge as it appears to not be level at the moment?
I am not trolling you..I think it looks cool as fuck
I didn't take any of it the wrong way. I programmed the image into 3d (rhino) then pulled into Aspire and lined it up on the body. Everything is carved with my CNC and the post holes are cut to the exact depth so the tailpiece and saddle will sit perfectly level and intonate fine. Unless the carve bugs your right forearm nothing should feel different but I programmed the whole thing to go with the curve of the carvetop so it gets thinner as it moves to the edge of the guitar. (basically the whole top started as a .6" thick maple top and after the dragon was cut it broke thru to the mahoghany on the outsides of the carve. The center of the top is still roughly .6" thick.
I plan on keeping the maple for the most part unstained but want to lay the maple stain a bit thicker in all of the crevices to create darker more defined lines on everything then I will spray a nitrocellulose finish over everything. All cavities are already cut and you can see the holes for pots and switches are there also. Notice the neck pocket is oversized as I plan to open a slot and glue the neck joint together.
Last edited:
I don't remember if it was a telecaster or a Stratocaster....
also - that is pretty awesome
Also - get a small sandblaster, we use them all the time to clean up shit like that on large castings, a low power home job would probably do a decent job. One place I worked had a small benchtop one about a foot square that they never used, looking back I wish I had stolen it now, would have been really handy for things like this. You can make a simple one with an air gun and a soda bottle filled with whatever medium you want to spray. Just drill a cross hole in the nozzle, bang the nozzle through the cap and invert it, venturi does the rest. Or you can probably buy a cheap portable one from the hardware for $50
If you are talkin about my completed builds over the last 2 years its one of these.