I will never do the wet method, boiling or steaming as I think its an abomination, granted I know it popular in some circles but to each their own.
The following recipe I got off of another board awhile ago, smoked pork ribs -
Step 1: Cut a hole in the box. Oh wait, wrong meat. The REAL step 1 is to trim and rub your meat. I usually get my ribs from Costco - the quality is consistently good and they give you a good sized rack (if you get them from the grocery store it is hit or miss, the racks could be huge or tiny).
There is a flap on the back that you need to trim off, as well trimming off the large steak-like portion of meet from the end of the ribs. It's kind of hard to explain, but
this site has some really good pictures that make it easy to know what to cut and what to keep. And when I say keep, I mean keep together, I smoke all the meat I trim off as well so don't throw anything you cut off away. It's just that you want it off before you smoke it rather than after. I should note that I DO NOT take off the membrane on the back, and I've never had any problems or complaints, the one time I did take the membrane off the racks wouldn't stay together.
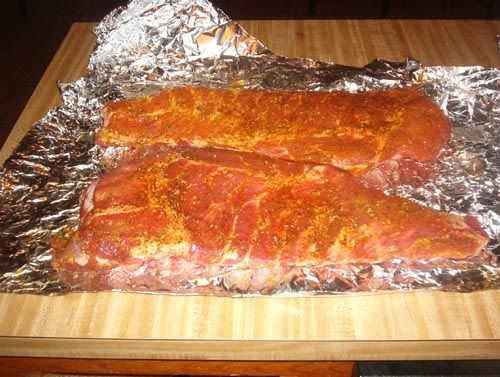
After the ribs are trimmed, I put down a really thin "base coat" of deli style mustard, and then rub with a combination of good ol' Bolner's Fiesta Pork Rub and McCormick's Montreal Steak Seasoning. And I do mean rub, it all sort of mixes together with the mustard when you rub it on the rack of ribs (only in the meat side), and your hands get dirty as hell, but it washes off easily. When you are done your ribs should look something like this:
Step 2: Start your fire. I use briquets - I tried the lump charcoal but I guess that I'm not experienced enough to keep a regulated temperature with that. I usually buy the HEB brand mesquite charcoal, it works great. To start the fire I use a chimney starter that you can buy at HEB to get my coals going:
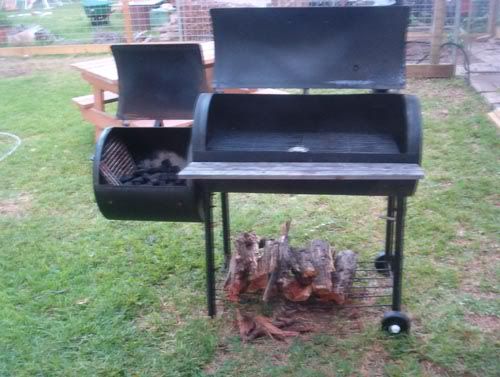
Step 3: Prepare your firebox. I have your typical old offset firebox type pit. It's kind of leaky and the metal isn't as thick as your fancier set ups, but it gets the job done:
Step 4: Add the coals to the firebox , Throw some logs on the fire (I use mesquite because I have a good source, but oak or pecan, properly aged of course, works well also) after you add the coals from the chimney, close the lid on the firebox and the pit, and get your temperatures to hold steady at about 225. When that happens, put your racks of ribs on the grill:
He uses mesquite but I prefer oak or pecan and I suppose apple would work well
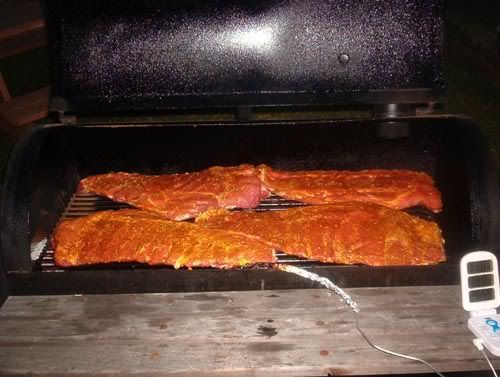
Step 5: While drinking beer, keep the pit temperatures as close to 225 as possible for 3 hours. Don't peek at the ribs, they are still there, and when you open the lid on the pit you let out most of the heat. I have a digital thermometer that I stick in the pit that does pretty well. After 3 hours, your ribs should look like this (notice how the meat has pulled back from the ends of the bones):
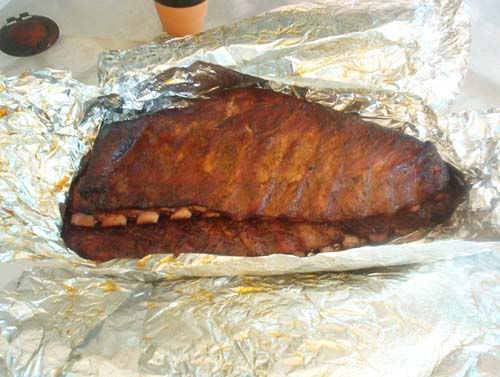
Step 6: During the last 30 minutes of step 7 you should have been preheating your oven to 225 or so. Take the ribs off the pit, wrap each rack up individually in foil (even though in the picture below I have them two racks to a foil pack, I've since moved on to individually wrapping them and I like the results), and put them in the oven for 90 minutes to 2 hours. The foil will make the ribs moist and tender, with the meat practically falling off the bones (in fact, be careful when moving the ribs between steps 8 and 9 because sometimes the bones will literally slip right out) and they look like this when you take them out after 2 hours or so of making your kitchen smell wonderful:
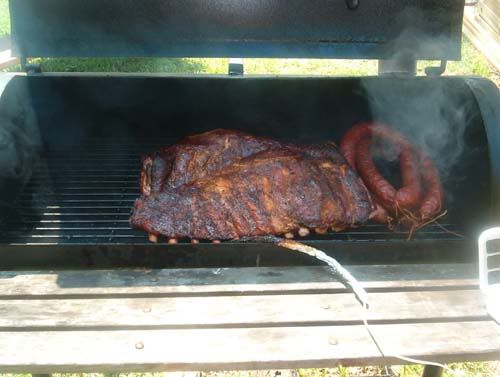
Step 7: Put the ribs back on the pit (I usually have something smoking on there at this time, like chicken or sausage), and let them "firm up" in the smoke for about an hour. You could just eat them after the oven step and the meat would fall right off the bone. However, that's not what I like, I like to firm the meat up a little bit and be able to cut them up and have the meat not be so tender you need a fork. Ribs are meant to be eaten with your hands! And I happen to think the extra hour in the smoke gives the "bark" a little bit of extra flavor. After this step your ribs should look like this:
Step 10: Let the ribs rest, and then carve them with your knife of choice, slicing between the bones. You can also cut the "knuckes" on the end off, but you don't have to. Be sure to save the best for the chef, because if you put them out they will go fast.
Now if you want to do them in the oven -
Dry Rub:
8 tablespoons light brown sugar, tightly packed
3 tablespoons kosher salt
1 tablespoon chili powder
1/2 teaspoon ground black pepper
1/2 teaspoon cayenne pepper
1/2 teaspoon jalapeno seasoning
1/2 teaspoon Old Bay Seasoning
1/2 teaspoon rubbed thyme
1/2 teaspoon onion powder
Braising Liquid:
1 cup white wine
2 tablespoons white wine vinegar
2 tablespoons Worcestershire sauce
1 tablespoon honey
2 cloves garlic, chopped
Preheat oven to 250 degrees.
In a bowl, combine all dry ingredients and mix well. Place each slab of baby back ribs on a piece of heavy-duty aluminum foil, shiny side down. Sprinkle each side generously with the dry rub. Pat the dry rub into the meat. Refrigerate the ribs for a minimum of 1 hour. In a microwavable container, combine all ingredients for the braising liquid. Microwave on high for 1 minute.
Place the ribs on a baking sheet. Open one end of the foil on each slab and pour half of the braising liquid into each foil packet. Tilt the baking sheet in order to equally distribute the braising liquid. Braise the ribs in the oven for 2 1/2 hours.
Transfer the braising liquid into a medium saucepot. Bring the liquid to a simmer and reduce by half or until of a thick syrup consistency. Brush the glaze onto the ribs. Place under the broiler just until the glaze caramelizes lightly. Slice each slab into 2 rib bone portions. Place the remaining hot glaze into a bowl and toss the rib portions in the glaze.
hope this is helpful and let us know how it turns out
")